A week or so ago we ordered a Letus AnamorphX 1.33x anamorphic adapter. It arrived with five hours to spare before the Glasgow 48 hour film project. Phew! That was a nail biter.
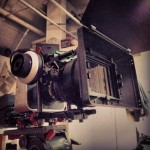
First off I wanted to show the squeeze factor, by filming a circular plate, and overlaying a perfect circle. FCPX was used to desqueeze the image using the “distort” function. I used a 2048×1152 project and distorted 100 pixels top and bottom (100, 100, -100, -100 values used in distort) to give a 2048×952 image using square pixels. There’s some flare tests – we purchased the multi-coated version so there’s not much flare. Then you can see the super close focus you can get with the adapter. The video was made with the Tokina 11-16mm f/2.8 EF lens, and two Zuikos, a 50mm f/1.8 and a 28mm f/2.8. With longer lenses you can start to see the odd shaped bokeh, and I briefly explain how to get focus with the adapter. You’ll then see a quick iPhone video of the rig to show you what my setup looks like.
Once I’d made that first section, I noticed that the aspect ratio I had been quoting the adapter at, was actually shifting depending on the position of the adapter. So the next section is all about what the actual squeeze ratio of the adapter is. The lenses used for the 48 hour film were Zeiss CP.2s. I’ve popped in a shot of a bike and an earring to show the correct circles you get when using 2.25:1 aspect ratio with these two lenses. First shot is the 18mm, second is 25mm to the memory.
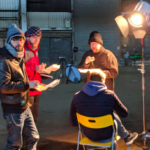
The last section is our first RAW anamorphic footage. Andrew “Robbo” Robertson stood in as we tested shifting the AnamorphX back and forward using the lens gear. The first clip has just been left to show you what you’d see on the BMC whilst shooting. Again I overlaid a perfect circle to show the aspect ratio shift. The conclusion is: depending on where you focus, you have to adjust how much you desqueeze the image in post.
So the plan of action, for us at least, is to make a look up table of desqueeze factors for each anamorphX setting (-10 to 10) and to include this setting in the camera notes/meta data so that each shot can be desqueezed correctly. After the desqueeze, I’d then crop the whole film to 2.39:1 to ensure it was consistent across the range. (It never seems to go beyond 2.39:1) I’m not going to do this until we get the Samyang cine lenses we’ve had our eye on. Will post our findings in due course.
For now, please take a look at our first anamorphic 48 hour film. Please note, there is strong language from the start, this film is unrated. For the record, the desqueeze we ended up using was 2.15:1, which was then cropped to 2.35:1 to get a more standard Panavision look.
The Unchecked Rampage of the Infamous Gangsteristas


